02 November 2009

Fly Tying Bobbin - DIY Style


This version comes nothing close to those you buy from tackle shops, it fact it does not even look the same. It is because I come across Shout Bobbin knoter that inspire this simple and cheap design, totally different from those you get from fly tackles manufacturers.

In fact I am not keen to invest on a proper one is because I don't really need to tie beautiful flies, I make those easy to make flies for spin cast only. Because of the cheap cost of those DIY flies, I can afford to cast them to those high risk area, and the loss are pretty high. Furthermore, the last time I enquire, a Taiwan made reasonable good bobbin cost in excess of SGD30, too expensive for me to buy and experiment, I have better use for the money.

The items I used are whatever I have in my house, spend just some time to think thru the design and quickly assemble them, spend less then half an hour to make this, and a while later for the 5 minute epoxy to dry. Cost me close to nothing, if you are missing an item, just search around your house for something similar and use a bit of imagination.


31 October 2009

Beginner Guide to start fishing

At tackle shop, whenever I manage to pick up a conversation between a newbie fisho and the tackle shop assistant, it is usually an interesting barrage of questions answered by some technical answers. I wonder at times how much can a newbie picks up these info and the frustration felt. Of course I can sense the frustration of the tackle shop assistant when these newbies are asking how to catch BIG fishes (maybe to impress the girl girl they are bringing along for the fishing trip), it's like trying to run before one learn to walk.
As a matter of fact when I started fishing, my dad is always around to help me. He is a fisho too, and he will prepare everything I need for me and more. But in those days, money is hard to come by, we fish the most traditional way, handline on pier and lakes. Only in my twenties, then I started to fish with fishing rods and reels, and started a new chapter of learning on fishing once again. Allow me to share with you what I have learnt so far and to explain as much as I can the simple basic fishing methods.
Let's start off with the most essential items, the rod and reels.  I will start with the most 2 common form of fishing locally, inshore baiting and light luring.

28 October 2009

Where to Grease / Oil on Reels? (BC and Spin)

I have these 2 image on my HDD giving a reference to what to oil or grease on Spin reels and BC reels. I can't remember where I got these from but they gave me a pretty decent guide on the places to oil/grease. However these could only serve as a guideline, as you might have specific requirement for some reels. From the guideline, it seems that whoever have done this is more concern about protection as seen by the heavy usage of medium / heavy oil.

As I am not into heavy oil since I do maintain my reels on a regular basis, thus I set up my own guideline. I like the use of lighter oils to improve my fishing pleasure, but they do dry up faster thus the need for regular maintenance.
Oil - for Fast moving parts, usually on ball bearings.
Grease - for Slow moving parts, usually gears and interconnect parts.
Some unique case where I will put grease into the bearing are like Abu handle bearing which then tends to rust rather easily and it is a slow moving part.

As for what oil or grease to use, here's what I have put up before in this posting Reel Servicing. Again, just as a guideline for you.


26 October 2009

Reel Schematics

Well, Google is offering so much more then just Gmail and Blogger. Let's not waste what others they are offering me, thus I put up some of the reels schematics I have on my HDD. So far I have upload these schematics, will add on when I have time start scanning and upload the rest.

Since I have upload it and might as well share it with anyone who might need it. Will simply update this posting by adding more links to the schematic I have uploaded.

Schematic
Penn SS7500 / SS8500
Daiwa Freams 4500J
Daiwa Sealine 30H
Penn 920/930/940
Penn 140L, 146L
Tica Cetus SB500


User Guide - Not useful, but might just need it
Penn 555/545/535GS 525Mag
Penn 920/930/940
Penn SS Series

24 October 2009

Accessories for Prawning


I feel the need to know more about prawning after my virgin experience at doing prawn fishing.

Please do not misunderstood that suddenly, I became an expert in prawning and now telling you how to do prawning. What I am trying to achieve is to share what I have learnt while talking to other fisho who like prawning, and hopefully newbies and fisho ,who are as clueless as me when it comes to prawning, can come to grasp with the concept without tearing out one's hair.

Although I have very limited experience in prawning, but with my noodle rod and limited pole fishing experience, I felt that it is actually not as difficult as I thought it would be.

Back to main discussion topics, this post will be more applicable to those who already own or intend to buy their own prawning rod. As usually the house rod is 'ready to go', there's not much things you can do to it.

First of course is the rod selection, some like soft tip while some like it stiff. After asking around, it seems that most actually prefer a soft tip. No idea why, could be because it is more forgiving and gives you a better sensation while fighting the prawns. I have been told to use soft tip rods if I am to do SW prawning, as they are more alert and frisky then their FW cousin. Length wise will depends on which pond you frequent, choose one that suit the pond.

Next if the main line, if you have some spare light poundage superline use them, be it fireline, power pro, etc. The lightest poundage is enough. Although it is just a short length, it does makes a different to me at least, in fact I am surprised that it did make a difference. Should you do not have any light poundage superline around, when you purchase your rod, ask the tackle shop if they can spare you some. I do know some tackle shops do give it to their customer when they buy prawning rods from them.
As a guide, the length of the main line, plus swivel, plus the hook rig should not be longer then the extended rod. This will make it easy for you to handle the prawn when you have lift it out of the water.

Prawning floats, that small tiny tear drop shaped float as shown in the pic above. Obviously, not all floats are created equally, in fact they come in different sizes / buoyancy, it is usually stated by a number on the float itself for the better quality ones. Unlike mine which is a cheapo version, there is no number indicator on it.
Once you have rigged up, and place the entire rig into the pond, the float should be resting between the 2 blacks lines, at the top of the float, at the water surface. Too much of the float above the water surface, the resistance of the float gives might cause the prawn to let go of the bait. Too little of it above the water, it get too sensitive that the water current might fool you to think a prawn is taking the bait. Do stock up some in different buoyancy, as on different day the water condition might be differs slightly.

Use the smallest swivel you can find, the swivel gives it the required weight to sink downwards and easy for you to change the hooks should you need to easily. Before you secure the swivel, make sure you have the float stopper on the main line before you secure it. I dun have any float stopper to show the pics, basically it look like a short length of rubber tubing.

Prawns hooks are available in most tackle shops, they look like circle hooks. Gone were the days where the ultra tiny hooks are used, these new designed hooks makes it easier to remove the prawns once they are caught. However, I learn that sometimes those tiny hooks are still being used once a while by some prawning fisho, might be on slow biting days, something I have yet to discover. Hooks are usually available tied and ready at the pond, just asked the pond operator for it.

In case if you wonder if I have incorrectly include the lead weight in the pic, I have not. This is the last tiny bit of tips I wish to share. This is a fast and easy method to measure the depth of the pond, simply hook the lead weight to the hook and chuck it into the pond to adjust the position of the float. Really quick and effective way to measure the depth if you keep moving around the pond.

23 October 2009

Fast & Easy Method to Rig up

Before I proceed further, I have to warn that this method is NOT the most secure way to rig up. I usually do this for my bait fish rigs, which usually I have to prepare a few set. This method allows me to do it at a much faster way then I previously do. Afterall, what will I loss if one of the hooks gave way? A bait fish that's all, nothing to cry about.

If you need a strong and secure knot, do not use this method. This is not for you. So what is this good for you might ask. This is the usual method when I do my tamban rig, Sabuki rig, Rabbit fish rig, and in fact any rig that uses multiple small hooks.

Afterall, what will I loss if one of the knots gave way? A bait fish that's all, nothing to cry about.
~~~~~~~~~~~~~~~~~~~~~~~~~~~~~~~~~~~~~

22 October 2009

Rod Review - ANYFISH ANYWHERE BIG BEACH surf rod 14ft


After having a far bit of mid-range surf rods passing thru my hands cause almost each and every rod that I used to own have always something I hoped it can improved on.

This is one rod that I really enjoy using, but the length is quite a hassle, 7ft long during transportation.  But once you reached your fishing ground, assemble the rod to cast, all is forgotten.

The very first time I tried to cast with this 14footer, I got worried as this is I have never cast anything longer then a 12ft6 before. Can I handle the extra length?  After a few practice cast to get the timing tight for the extra length, I tried it with my half baked OTG. Oh yeah, the lead just shoot out into the horizon (as a matter of speech).  Right after that, I decided I love this rod, and I still do even I seldom do surf fishing these days.

From the pic, you can see that I am using a high mount position for the reel, which in actual fact is wrong because the rod is designed for a low mount reel, thus they gave you a 18inch reducer. But heck, I can't do low mount, so it is a high mount setup for me and it works for me.  While doing my research before purchasing the rod, I read on their website that it have a 'fishing tip', exactly what I am looking for! For a novice surf angler like me, I really needed the softer tip launch the lead out as I usually don't compress the mid section enough to get the power. Also softer tip equates to bite detection, which is also what I really wanted. Back to the pic, this is taken when I have an unknown biggie at the end of the line (I hate to admit it, but I lost the fish because of a lousy rig), see how soft the tip is? It is during this hook up that I notice the tip is moving before my reel line out alarm goes.

A couple of major problems of using a UK style surf rod for asian are resolved with this rod, weight and blank thickness. Make no mistake about it, this rod still cast like a typical UK surf rod, except that it is much lighter (still heavier then Jap rods) then those of old and the blank thickness on the bottom section surprises me. I had a much more comfortable and secured grip then the older Penns that I used to owned.

Yes, I do love this rod, and No, it is not the prefect rod for me.
However, this is the closest thing to a prefect rod for me. Thus for now, it is still my rod of choice for beach surf fishing.

+ Impressively easy to cast 14ft.
+ Soft Tip, bite detection and ease of casting for beginners.
+ Though is a UK style rod, it's weight and blank thickness should suit most Asians.
+ Good quality rod bag with pocket for the 18 inch reducer.
- Not available locally, purchase this rod via a mass order exercise.
- Would actually hope it comes with SIC ring guides, however it is using Alconite ring.

Disclaimer
Review is based on my personal experience and thoughts. This review bias towards surf fishing rather then distance casting.

20 October 2009

Ed's Pro Pond - Location Review

Wrote a CR using these pics in a local fishing forum early this year and created some big hoo-ha. That's one reason why these days I prefer to do all these fishing stuff on my Blog, remove all these issues and also easier for me to check back should I needed to. Also with the soon might be implement MDA guidelines on blogging and commercial interest, I better put in a disclaimer before I get myself into any trouble.

Disclaimer - I do NOT have any commercial interest in this fishing pond. It is just that I know one of the staff there which I know from fishing trips.
~~~~~~~~~~~~~~~~~~~~~~~~~~~~~~~~~~~

This pond is a SW fishing pond that is located at Paris Ris Farmway 3, not too sure what's it name when it is first open but it is known as Ed's Pro pond because the boss is known as 'Ed'. As you can see from the date stamp on the pics, these are pretty old pictures by modern standard, but it still generally look the same except for a few more shelters.

When one first visit the pond, it could look be depressingly small, most 'Pro' pond are usually larger then this. However, the magic of this pond is it's depth, I am told before it undergoes some renovations, the deepest part is as deep as 4 meters. Having the depth, even catching small GP are fun too as they will dive and dive, however most anglers will be going for the snappers and groupers for it's meat. From what I understand, during the renovation, they have fill up the bottom with new sand, pumping in fresh seawater, building trenches to help fish distribution, and some small other improvement. While the water condition have definitely improved, the hot spot for the snappers are still at the keep net area. Alex, a friend and one of the staff there, told me just a couple of days ago that there is a couple more hotspots around this small pond. I might be meeting up with him soon for kopi and hopefully will be able to reveal where are the other hotspots.

Currently they are running a couple of competitions, which is kind of confusing to me, anyway they are basically the heaviest catch of the month. Prizes range from High End tackles to Free membership at the pond (X hrs of fishing bascially).

Info
Address - 70, Pasir Ris Farmway 3
Rates - SGD50 for 5 hrs, fish release at 5hrs interval; Weekend Night fishing from 10pm till 7am (I think), NO fish release.
This is a Catch and Keep pond; However fishes above 5kg and GT are to be released back to the pond.
Others - There is a Snack store, prawning area and FW CnR which is operate by another operator.

Below are some other pics of the pond.

Why use a Noodle Rod?


The very first time I have seen a noodle rod in action is on a Sibu kelong by DesT, then I don't know him yet, but yet he is willing to tell me about the rod, lasso rig, etc. Many moons later, I meet him once again on a Sibu kelong and is formally introduced to him, and after many trips together, we have become good friends.  He is considered to be one of authoritative figure in Noodle Rod locally, and almost everything I know about noodle rod fishing is learnt thru him.

Noodle rod, that long,soft, limpy looking fishing rod that look like it will break anytime soon. Why would any angler want to use it to fish? It look like an fishing rod that will break really soon, and would anyone able to bring up anything larger then bait fish with it?


First, let's make it clear that noodle in the Noodle Rod is NOT a brand, it is a Rod Action classification, which is confusing to a lot of anglers locally because most of the rods sold here are seldom goes below Medium Light action. As you can see from Noodle Action is in the last position, which means you can expect a rod with very little backbone and flex almost throughout the entire length of the blank.

Extra Heavy ; Heavy ; Medium Heavy ; Medium ; Medium Light ; Light ; Ultralight ; Noodle
Given the lack of power in the rod, if you fish the traditional method of tug-of-war method, stay clear of this rod, this rod is not built for this purpose. Must likely the only tug-of-war you are likely to win are with bait fishes, hardly one's idea of fishing. Even if you intend to use this rod to jig for bait fishes, Don't. The action is so slow that chances you will not get a hook up when you try to set the hook, we have tried before and failed big time for bait fish jigging. So what the heck is this rod good for?

If you are fishing in open waters for pelagic species, then this rod will suit your applications. You are asking for trouble if you use this rod to hunt for groupers, snappers, stingrays. Simply because you need to tire the fish before you can bring it in, if they go into their cervices in coral or rocks, the rod will not have any power to pull it out of it.

Still, I have yet to answer the question on Why use a Noodle rod? Using light lines and smaller hooks, it will not spook fishes that easily and hopefully entice them to feed on your bait. But using lighter lines and hooks, any sudden jerks or turbo-boosted run by these pelagic species will likely to lines to snap or hook being straighten, with the noodle rod acting like a shock absorber to take these punishment, you will be able to land your fish.


18 October 2009

Making Todak into Otak

Banana Leaf wrapped OtakThis recipe is done like a year ago, I posted it up on a couple of local fishing forum. However, being so old, I have a hard time looking for it if I need the info. As this recipe is given to me verbally, I have no digital record of it, so decided to put it up here.

PhotobucketTodak is a type of gar fish which is found in abundance in our surrounding waters, while considered a pest fish for most anglers, myself, DesT (my great fishing kaki and mentor) and a small group of noodle rod users like to target them. Not for it's meat but for the great fight it provides on ultralight tackle.

As it's meat is pretty firm and bland, it is cooked usually as curry or assam pedas in our region but I decided to give it a little twist by using it to make otak. As very little flour is used, the finished otak is essentially fish meat and spices mix, very filling on the tummy.


Abu 5600D5 - Hidden Cast Control adjustment

Abu 5600D5 is marketed as a Smart Mag Brake reel, which suppose to reduce the line overrun to 'Zero'. This posting is not to discuss about the no overrun design, but on the adjustment one can make on the hidden Cast Control Knob, which is not visible on this reel. This series have been removed from Abu reel line up, but I suspect the current BCX Series might share this hidden feature.

When you first see this reel, you will notice that the Traditional Cast Control Knob is not available on this reel, at least from the exterior. Instead you will have a Mag Control Dial to set your desired Mag Brake, so does that mean that the spool position is fixed upon manufacturing and there is no way to adjust it? Fact is, when you adjust the Mag Control Dial, you are also adjusting the Cast Control at the same time.

Higher Mag brake - Tighter Spool position and vice versa.

While most are happy with the 'Default' setting when reel is shipped, I am not too happy with it as most of the time the spool is too tight for me (i.e. lateral movement is very very minimal). I prefer the spool to be more loose (slight shift left and right) at Max Mag setting. Thus I set out to explore the reel more and manage to 'tune' it to my liking.

Note - As it is troublesome to adjust it, I will not advice anyone to do it in the field. So you might need to go thru a few test casting session to get to a setting you like.

I have posted this article on some local Fishing forum, simply now to put it on my own blog in order to have a record of my works.


15 October 2009

Virgin experience - Newbie 1st try at FW Prawning

Prawn CatchFor all the fishing I have tried before, fishing for prawn is something I have never ever try before.  Although I have learn from other anglers about the art of prawn fishing, I have never ever tried it until today.  Alas, no longer a prawning virgin already.

PhotobucketIn fact, it is something I didn't setup to do, it just happen. I am at the Taman Jurong Pond to pass time with a friend, then met some other fisho friends as well, who are into prawning. As usual, started talking about fishing stuff and inadvertently about prawning, one of them is a prawning fanatic at this pond and share with me some tips and show me a few tricks as well. Since he intend to do some prawn fishing, I shamelessly asked to tag along to learn more about the feeding pattern, when to set hook, where to hunt etc.  And yes I do learn a lot and managed to catch some prawns when I tried using his setup with guidance.  I am very very impressed with his catch, he is still fishing (albeit finishing soon) when I left and he have already catch an estimated 50pcs of prawns, pic shown are just part of his catch which he gave to me.  In the pic there are 30 prawns (yes yes, I counted them), plus the smaller 1st batch he gave away too, that comes up to an estimate of 50pcs.

07 October 2009

Some Minor Add-On

Finally have sometime to check out some new Gadgets to add to my Blog

1. New random Post on Side Bar
2. Related Posting after each posting

Something you can't see, that's using Google Analytics to check out the traffic on this Blog, if readership is low then I might just give up writing those tutorial as they are troublesome to do.

Wanted to try out some new template for the Blog to give it a 'fresher' look, but alas cannot find a good & free one. Will spend sometime to check out more from the web.

02 October 2009

CR - 1 hour Quickie at Taman Jurong Pro Pond

Taman Jurong PondEver since I knew more about rubbers lures and how effective it is at the Taman Jurong Pro Pond, I always recommend fisho I know to try out rubber at the pro pond.  After a long long break, I visited the pond 2 weeks back with a non-fishing friend, not to fish but to watch EPL at the little pub there.  As the water is very clear that night, I can see a few schools different species of fishes they released (KBL, Taiwan Ngor and MJ).  Notice that the KBL are of decent sizes, 1kg+ and saw a 2kg+ one too, I find that odd as usually they release 700g to 800g KBL only.  However, with 5 rods at that time and all using live prawn, I didn't see anyone catching any fish.  So sent as SMS to a fellow fisho who like to fish at this pond, telling him the KBL at the pro pond have grown cause no one is catching them.

This evening, fisho friend called me telling me he wanted to go take a look at the pond as he have not been there for a while, so off we go with no fishing gear.  But I brought along two 1/8 oz jig head and some rubbers, in case of zero fighter newbies who need to bring at least one fish home, I can give them the stuff to try.  After a while, friend get really itchy as he didn't fish for a while, and after seeing that I brought the rubbers, he decided to pay for an hour of fishing using their house rod.
Cabala Rubber
After a very short session, he decided to take a smoke and pass the rod to me to have a go, a couple of cast later, I got my first hook up, but alas, jerky drag plus entangle with another angler's line make me lost the fish and also the jig head.  Damn, now left with only one jig head for the rest of the session, thus we decided to go for high drag setting and hopefully bring in the fishes fast to reduce the chance of line out situation.

Friend landed 2 fish shortly, one KBL and one MJ, and after that I have a go, I simply cannot believe that I have 7 takes and zero hook up and friend got 2 to 3 takes and also zero hook up.  However, we both ended the one hour session pretty satified with the bite rate, but non too happy about the hook up rate.  I think the jig head hook got blunt after the 2nd fish is landed, this unable to increase the hook up rate.  But nevertheless, it still prove to us that rubbers work well at the pro pond.

Tips
Bring your own tackle, their reels is in real need to service and have the drag system changed. Drag is jerky, and is either low or very high setting, not good at all.

Use rubber with good tail action, commonly found rubbers like Sure Catch, Angler's Pal, White Rabbit are okay, but the material is a bit hard, trim the section between body and tail thinner to achieve better tail action; Without good tail action, catch rate is significantly reduced. Remove the bottom triple hook as well, snag too easily as the strike zone is just above the bottom of the pond; Best are those soft unweighted rubber to be used with jig head, can use as it is with good tail action.

Tips - Kelong Fishing @ Sibu Kelongs

PhotobucketA kelong visit with family or friends are always an enjoyable trip, to enjoy the outdoor, sea breeze, blazing hot sun, sea all around.  These days the kelongs found in Sibu Malaysia are converted into a family resort style, no longer used to haul in fishes from the net.  To spare you the agony of reading the history of kelongs, google for more info.

Back to fishing, whenever I visit kelong it is generally to fish.  Heck, what could an angler ask for when he is surrounded by sea? So what can you expect to catch from a 'hut in the middle of the sea'?

What I can share with you is what I have learn from fellow anglers, who so unselfishly shared their knowledge with me. I should now in turn share with you almost everything I know about fishing at these beautiful kelongs, except for some closely guarded rigs which I am not suppose to share openly without their permission.

Instead of telling you what rig to prepare for a kelong trip, allow me to do things a little bit different here.  I will put up some different species of commonly found fishes and the method to fish for them.  There are usually hundreds of method to fish, and as a matter of fact I am still learning as always.  But these are my usual methods whenever I want to specifically target for a certain species.  Most method are using baits instead of artificial lures, as I am not experience in luring and kelong are a pretty tough place to lure due to the height where we will be fishing.

Comments are always welcome!!!


21 September 2009

Spinning Reel - Complete Strip down, Clean & Re-Lube

PhotobucketThis is a picture intensive posting, but I will put up the images in Thumbnail (as for this series of Reel Maintenance), these images are for reference mainly as there is an old Chinese idiom, a picture is worth more then hundred words.


Most of us started fishing using a spinning reel, as it is easier to operate and also generally cheaper then a conventional reel. And usually your first experience using a spinning reel will be a budget model, either you purchase or borrowed from friends or family member. (No one in his or her right mind will lend an expensive reel to a newbie fisho)

Some friends I know can’t be bothered to service these budget reels, they would only spend money to service the higher end models. However, budget reel can last a long time if one bothers to take a bit of time and effort to keep them in tip top shape. One fishing pal I know of uses the same budget reel and have landed hundreds of fishes, while mine have landed maybe a hundred plus and both of our reels are still going strong.

Many a time anglers are afraid to open up their reels to clean and re-lube them, worried that they will not be able to put everything back together again. Spend a little time and effort, that first reel that your parents buy for you (most likely hidden in your storeroom) could once again become your workhorse and rekindle the fishing passion that have long passes you by.


Before you start, please do make sure that you have the schematic drawing of the reel with you. In the older days, it is printed on a sheet of paper, while nowadays some are printed on the box itself. Having the schematic drawing will guide you along if you have lost your way while putting the reel back.
Some classic reels schematic are available off the web, Google for it if you can't find yours.


Disclaimer - Dismantle your reel at your own risk. I will NOT be liable for any responsibility if you are unable to re-assemble your reel back together.

Roller Bushing on Spinning Reel - Direct Replacement

Roller BearingVery often you heard about by having a roller bearing instead of a roller bushing will enhance your fishing experience. I will show you how to do it, however should your roller bushing is of an odd shape or size; it is not possible without any modification. See previous posting on having an odd shaped roller bushing Roller Bushing to Bearing


In this posting, if your reel is equipped with a bushing that have a bearing that is of exact fit or if you think your roller bearing is rusted and need a change, you will find it useful.

Before you proceed, do ask yourself if you really do need to 'upgrade' to a roller bearing. Reason being roller bearing are highly prone to rust due to it's exposure to the elements esp the salty water that your line picks ups.  And if you do not maintain your reels often, this might not be a good idea.  Nothing wrong with the bushing design really, it is almost a maintenance free part, thus I am not really surprise to find some mid range reel, ie.g. Daiwa Kix, using bushing rather than bearing.  Anyway if you do fish on a regular basis and have some extra cash, do consider to upgrade those mid range reels' bushing to ceramic hybrid bearing, not fool-proof but definitely a few notch above the standard ball bearing in terms of being rust prone.


Changing Drag Material on Spinning Reel

Old Drag vs New DragAnglers how fishes regularly will know that drags will degrade over time, either loss of drag or jerky drags. Most time, a simple clean and service of drag will be suffice to get it back to shape, but sometimes, a change of drag material is required.


This is a simple tutorial on how to change the drag material on your spin reel. I choose a budget reel instead of a high end reel for a simple reason, I believe 95% of reel volume sold are budget reels. Most spin reels have the same configuration and the choose reels for drags, though some have washer proof washers (e.g. Daiwa Freams 4500J), or have the drag material at the bottom of spool instead (e.g. Penn SpinFisher). Least not forget some reel have duel drag (top and bottom of spool) but not going to cover them simply because I do not have such reels.

Before I proceed, I do recall a fisho asking why I bother to service and upgrade my spin reels (which are mainly budget reels). He say "Just get a new one when you old one breaks down, why bother with them when they are so cheap". Actually I am stump for an answer to him, in economic sense it make no sense, but boys being boys, they need to take things apart to investigate and try to improve wherever they can. Some modifications I do are to suit my style of fishing, while others are just for the heck of it.

Enough of this off-topic discussion, back to the tutorial

20 September 2009

Simple Spinning Reel Maintenance

Reel OilsIn recent times I have not been fishing much, so updating this blog with a series of reel maintenance tutorial. This posting will cover the most basic one of all, oiling the bearings on your reel to simply keep them in a smooth operating condition.

Ever wonder why the brand new reel you purchased feel silky smooth when you first start to use it but after a few fishing trips and been kept in the storeroom after a period of time, they does not feel as smooth as your first purchased it?

Irregardless of either a budget or high end fishing reel, they do need to be cleaned, serviced and lubricate. Reason being these reels are basically mechanical equipment, and with all mechanical equipments, without any lubrication they will fail to function well and wear and tear rate will increase drastically.

Some anglers have their lucky reel, some reels have sentimental value, and some might feel it is a waste to throw away a reel just because it is not longer just as smooth as it is just purchased (like me.....)

Though spinning reel have different gearing methods, but some parts remain very identical from budget to mid range to high end reels. And one such part is bearings that are found on either side of the reel support the handle assembly. Lubricate these bearings not only will it prevent rust and will also bring back some of the smoothness back. If you have never oil them before, imagine what is happening in the bearing – steel rubbing against steel without any lubrication. Albiet, some budget reels have bushing rather then bearing, in this case, then there is not need to oil those busing.

What about the gears inside the reel? Does it need to be lubricated?
As a matter of fact, the answer is YES. However, as most reels are packed with grease internally when they are shipped out, thus there is a good chance that there is enough grease to keep it going for a while.


14 April 2009

Changing Roller Bushing to Bearing

One of the fav mod that anglers like to do is to change the roller bushing of their budget reel to ball bearing. A lot of budget reel are really easy, as the bushing as the same shape and dimension for a direct ball bearing replacement.

Shimano budget reel are a different beast altogether (might be just what I have), their bushing is of an odd shaped and the outer diameter is JUST slightly smaller then a standard ball bearing. This is what I have gotten to replace my Shimano Aernos XT to a ball bearing with a fair bit of work needed.
Original Bushing vs Modification
The black bushing and ball bearing is to replace the white bushing.

1. The roller ID measures just a little smaller then an standard ball bearing, so what is required is to grind the OD of the ball bearing to fits inside the roller.
2. The black bushing from another reel that I have replace it with a ball bearing, the OD fits the small groove found on the inside of the roller. The ID however is bigger then the ball bearing ID due to the the form of the assembly. However this is not an issue as this bushing is simply to act as a stopper to prevent the roller from slipping into the assembly.
3. The items are put in the order as shown in the pic, you might need a small thin shim to keep the roller bearing to come into full contact at the base of the assembly.
Prior to Final assembly

Points to note
1. The method of jamming the entire ball bearing into the roller works, without the need of any additional bushing. However, it is very difficult to remove the bearing when it got rusted. I will not recommend this.
2. If you cannot get any bushing like the black one I have, cut the original bushing. Remember you need the part with the 'lip' to prevent roller from sliding into the assembly. It is the cleaner white portion in the pic.
3. It is important to have the stopper bushing, once the roller slide into the assembly, your reel might not be able to lay the line correctly. You can use a bearing instead of a bushing if you find one that fits.

I will update further on the size of the bearings.


06 April 2009

New Spoon additions

I have no idea what happened to me recently, or rather what happen to our local fishes. For some strange reason, recently all my hard lures stop producing catches and the only bites I get are from spoons. Just a few weeks ago, I bought a cheapo spoon I spotted at Tackle2000, shaped like the ever popular Yozuri Altima spoon but at a much lower price, but without the scale and eyes detail. Friend tried it on it's maiden trip hook up a very decent sized PB while all the other lures we tried yield nothing.

Cheap Spoon

A few months ago, I grab a few spoons at Siow Chiang Warehouse, not that I like them but at just $1 each, what the heck just grab it. Only when I got home did I realized that I got a bargin, Abu Toby (already tarnished), Blue Fox Pixee and Blue Fox Tear Drop. My guess these are very old stock, thus it is re-packaged in a simple plastic bag and priced cheaply to sell them off.

Pics of the spoons coming soon.

General rule of thumb is to get silver color for clear water and gold for stained water. If you just want to buy just one spoon, I will recommend the Yozuri Altima Spoon, a great spoon but for it's price, it seems pretty expensive for a piece of bended metal. I am still waiting for our local tackle shop to bring in the 7G version, 14G sink a tad too much for me for the places I am fishing in.

02 April 2009

2nd Article for Fishing Addict

I am to write an article on how to completely stripped, clean, re-lube and assemble a spinning reel. On hand I have a few spin reels to choose, cheapo magazine team didn't arrange any reel for me to use so have to use my own reels. I don't have much spin reels so choice is limited.

Shimano Alivio FA 2500 - Lowest end of Shimano Budget reels, but albiet modified with extra bearings.
Shimano Aernos XT C3000
Ofmer Axis 6
Daiwa SS700
Pioneer 4000 reel - Forget model liao, but is a 5BB reel.
Daiwa Freams 4500J - Can show change bearing to BB as I still have the original bushing with me.


Help require for suggestions!!!


Appealing for suggestion on reels selection for my 2nd article for our local (Singapore) fishing magazine to be launched soon. More details here
Do put down your choice in 'Comments' and your feedback is appreciated.
Please do help me to spread this message in your own BLOG or any other media that's easy for you. (Sorry, I can't get the 'BLOG This!' widget to work, will try to fix it asap, meanwhile you will need to cut and paste the link)

Update - 'BLOG This' link is already up, just simply click on the 'Post Header' to open up this specific posting only. At the end of the post, Click on 'BLOG This' to link this article directly to your own BLOG. Works only if you are on BLOGGER too.
Thanks for you help.

How to DIY Jighead

I have shared these in a couple of local fishing forum, forget about it totally until now. Time to put it up on my blog.

Ever since I started luring, I have been looking for cheaper alternative for stuff I can DIY. Started out with DIY spin fly, then Jighead with tinsel, and now Jighead using offset hooks for rubbers.

For my FW application, I usually go for light tackle, hence 1/8oz jighead suits me well since I am now more interested to use rubber then hard lures. Anyway decided to experiment to DIY my own jighead with some very simple stuff. Furthermore can customized weight and hook size to your own liking.

DIY Jighead 01
Stuff you will need, Solvent Based Paint (A), Reflective Paper (B), Hooks (C), split shot (D), 10 or 5 min Epoxy (E), Super Glue (F), Hole Puncher (G).
For rubber better to use off set hooks, pic of off set hooks and finished jighead. Link Here


DIY Jighead 02
Drop a little Super Glue between the groove of the split shot and insert the hook. Apply pressure till set.

DIY Jighead 03Photobucket
Use hammer to hit on either side till the split shot gap is enclosed completely onto the hook shaft. Or just a clamp to do this job. Make sure the flat surface created is large enough to paste an "eye" on it.

Photobucket
Next is simply a paint job, use primer if you have else like me just do 2 coat. If you intend to dip the entire jighead portion into the paint to color it, insert a toothpick in the eye of the hook before doing it, this will prevent the paint from covering up the entire eye.

PhotobucketPhotobucketPhotobucket
Using the hole puncher, punch out some round reflective paper. Paste it onto the flatten surface using super glue and finish it with a coat of epoxy. Draw a black dot on the reflective paper to complete the eye. Alternatively, use those ready made 'eyes' available from tackle shop to do so.

Final pics are my tinsel added jighead for PB hunting, use it like a lure except you impart all the action yourself thru wrist and rod action.
DIY JigHead Fly

01 April 2009

Luring Snaps & Swivel

Ever since I took up luring, I have been searching for small swivel and good snaps to use.

Sasame Swivels
Seasoned lurers told me big swivel can affect lures swimming actions, furthermore I have a liking to use small lures for FW, so small swivels is a must. After searching and asking around, finally decided on the Sasame Swivels, for it's size, it's rating is extremely high. Imagine, 19kg rating for the smallest one (size 10) I can find, I find it hard to believe but still bought it and use it. After a few times I am convinced it is indeed very strong but still 19kg is untested water for it.

The day came when it get tested out is while talking to DesT, he mentioned that those ridiculously small Surecatch swivels he use for his noodle rod application are super inconsistent. Same Size different rating, 4kg or 4lbs, very likely due to different batches. And while he tested them, some broke below the 4lbs mark, one batch fails so badly that it have around 50% pass rate. I recommended him the Sasame swivel and you guess it, he did test them out. At 9kg, the rings deformed to diamond shaped, and at 19kg, it still works and swivels. Now I can use it in peace, knowing it will holds up well and well below my line rating for luring.

Comes in red or black and at around 40 cents per piece, not exactly cheap but heck if it keeps my lure on my line, I will be happy to use them.


Seahawk Snaps

I do agree that these Seahawk snaps are very likely re-branded make in china snaps. But recommended to me by Eric of Tackle2000. I do like it a lot, pretty strong and easy to change lures. So far no failure. Cannot compare to those decoy and genesis Egg Snaps, but good enough for me. and at around 10 cent per piece, very affordable.

Sasame Swivel & Seahawk Snaps

14 March 2009

North Side Fishing Ground

Took pics of these couple of spot from Siow Chiang Warehouse cum Showroom entrance at Ubi. Now too sure if these spots are still accessible or not. Nice of them to reveal spots for their customers.

Basically these are instruction map to the exact spot, the yellow highlighted route is their suggested way to get there. Dun think I have try out these spots, but kind of too far away for me to explore.

Click on Thumbnail below to see the map on my Photobucket account.

Fishing SpotFishing SpotFishing Spot

Lure Retriever

This posting is long overdue, managed to dig up this pic while cleaning up my PC.

When I started luring, I have been losing lures like nobody business. This Surecatch retriever sort of solve some of the lost lure issues, basic design like Tackleback model that Dave of Lure Haven recommended me.

12 March 2009

Blog Layout

I did a minor overhaul of this Blog outlook, hoping it will look better and more personalize then other Blogs.

Major Changes
Header Picture
Better looking 'About Me' Pic
Added Meta Tag for Search Engine

Minor
Background colors and borders
Suppose to be GIF Clownfish icon, but alas, dun know why the effect become like JPEG only... GRRR!!!!!!!
Add Follower Widget - No idea what it does but heck it is 'NEW'

Failed attempt
Change Template - Wanted a 'Wide' Body design for the pics, but very few available.
Flash Tag Widget - Gave up trying cause I keep getting a White Square

Looking forward, I will attempt to do the following
Adding a counter on the Blog - Not easy not difficult, but worried the hit count is too low on this Blog... haha
Continue to search for a nice template, hopefully can do much customized.
Think I need to learn a little of those HTML codes, else very tough to understand what am I doing.

Do leave a comment on the new look. Cheers!!!

10 March 2009

Understanding Rubber Swimbaits

My lesson is angling goes on, after tying so hard to understand how fish like plastic instead of real baits, now there is new stuff for me to ponder upon.

Real Bait vs Plastic Lures vs Metal Lures vs Rubbers
Goodness me, when will all these new stuff available in the market stops??!!!

Technically, using plastic should be classify as Luring, I think. To be frank, I always believe that Rubbers will perform better then hard lures, not because they are considered a Newer Technology thing but they are more true to life then the hard plastic. Thus the swimming action, feel and now taste will be as close to the real thing.

My 1st introduction to rubber swimbaits are really bad, not because of me the angler but because no one know how to use them effectively. Further more, the crazy price tag it has and the poor quality rubbers that tackle shop brings in, makes many anglers locally to turn away from using rubbers and put their trust in plastic where it have a better range due to it's more established market.

My first real encounter with rubbers is actually just a few weeks ago, that is when I first meet Alvin at the Taman Jurong Pond.
1st meeting with Alvin
When I first feel the rubber, I am actually amazed by it's soft yet bouncy nature of the material, unlike those that I have seen that are pretty much very hard. With the softness of the material, the swim action of the paddle tail is much much better, entice fishes to 'Check It Out'. Now this is what rubbers should be like.

This kindle my curiosity in rubbers, and started reading more about it from mag, webpages and fishing forum. Also, a couple of fishing trip with my fishing neighbor, I begin to like rubber more and more.

Remember that I did mentioned that using rubber is like luring? Even with it's life like feel of a real bait, it still needed to be worked in the water to attract fishes, jst like hard lures. I am still a novice at using rubbers, and still have a long way to go before discovering more ways to use them.

Taman Jurong Pro Pond
Being close to my place, I visited this place not for fishing but to sit down talk cock with friends. I have the pleasure of fishing here a few times using rubbers. As this pond stocks up mainly seabass (KBL), Taiwan Ngor and Mangrove jacks, you know what exactly what you are fishing for. That's also one main reason why I hate pond fishing.
Using the Cabala's 3" rubber (Model - Action Tail), this is deadly for the KBL in this pond. During my last visit there, 3 anglers is having bad yield, one of them gave up after and give me his remaining 1/2 hours, I managed to hit 4 fishes, 3 KBL and 1 Taiwan Ngor. Pretty impressive considering during at that time live bait yields nothing at all.

New Tiew Auntie's Pond
Tag along for 2 trip with my fishing neighbor, the hit rate is consistent with using live bait or fish meat. As they stock mainly snappers and KBL here, most regular will target the snappers that are hiding under the net area. Using Keitech Swing Impact, Berley's Gulp produces better hit rate.
During our last visit, I tried for about 10 mintues and produced 3 hits, but alas lousy hooked up cause me to loss all 3 fishes. But now at least I know what to expect and have a new plan to catch them should I have the chance again.

If I were to do pond fishing, I think I will use rubbers instead of baiting. Reason being as these fishes are farm breed, and is Catch and Killed, there is no way for them to get used to rubbers, unlike CnR places where they might seen rubbers for like 10000 times. Given that you are covering more area by working the rubbers, I think the catch rate shouldn't be worse then baiting. Although rubbers are likely to cost more if not the same as Live baits, but in retrosect, if they catches you more fishes why not.

Below pics are the Cabala's Action Tail and Keitech Swing Impact with my own DIY Jig head and the Offset hook used to make my jighead for your reference.

Can't wait to try out some new rigging method at the ponds.
DIY Jig head and Rubber Swimbaits

1st Article for Fishing Addict

Last week finished up the 1st article for the 'Fishing Addict' on Reel Maintenance. It is such a simple article that I really feel it is too basic for anyone who does fishing. But keeping in Alvin's instruction to make it even suitable for the most basic angler, I have to do it from the most simple and basic step first.

Next 2 issue will be on spin reel and baitcast reel fully stripped to clean and re-lube, such be much more interesting then this issue article.

Nevertheless, I do think the 1st article is important as recently I learn that my fishing neighbor have no idea how to do the most simple thing of oiling the bearing on his spin reel and he asked me a hack lot of questions on drags. So maybe Alvin is right there, basic stuff for basic folks for a start.

Looking forward to a more challenging task of writing the next 2 issues.

20 February 2009

Magazine - Fishing Addict

Our local fishing community is really small, just 4 days after DesT mentioned to me about a soon to be launch local fishing magazine, Fishing Addict, I met the publisher at Taman Jurong Pro pond. It is really a tale of sheer coincidence, or as the Chinese would say, fated to meet.

Last Friday night, I meet up with DesT at the Taman Jurong Main pond when I learn that he is fishing there, as usual we talk cock and he mentioned to me about this new soon to be published local fishing magazine. As much as I am excited about it, I have my misgiving about how well receive it will be as our fishing area is so small compared to Malaysia. Given that we have 'Rod and Lines' available here, will it help to have another fishing magazine given the much smaller fishing community we have here.

Just a couple of days ago, I receive an SMS from my neighbour and also fishing kaki to have dinner together to catch up. After a good hearty dinner of Nasi Brani and tea, we decided to pop by the Taman Jurong Pond vicinity to look at the 'After Dark' activities. Well, after less than 3 minutes I got bored and decided to go to the pond just to see how the catch there is like, although I know it is very very bad USUALLY. While we seated at the Pro pond talking cock, an angler come along and set up his tackles. Hey from the way he does his stuff, he know what he is doing and we both think he is an experienced angler, so decided to pay a bit more attention to him while continue to chit chat.

Seconds later, BANG, fish ON!!! WOW, that's real fast, fluke catch? Maybe....... now we are giving him the full attention at his next cast, wanting to know if the first catch a Fluke shot. Again, BANG, fish ON, now that cannot be true given that the other angler is not catching anything on Live prawn. And over his first 6 cast, he have hits on all of them and landed 4 in like what 10 minutes. Unbelieveable, Unheard of, is he THAT lucky? Is this the same ultra unproductive Taman Jurong Pro Pond that I came to know?

His hit rate really really stirred up my interest, I just have to find out more about the lures he is using. Knowing that some experienced anglers are super secretive about their 'secret' weapons, we need to tread carefully in order not to have hooks embedded in my face or having leads thrown at me. He is very nice indeed to show us what he is using and from then on we struck a nice conversation going about fishing. When he mentioned that he is working on a nice local magazine, he is so surprised that I knew about it and one things lead to another and now I am in the mist of being part of Freelance writer on the mag. Most likely on Reel maintenance and modifications Section, not too sure which other section I can contribute in.

Hope to be part of the team, more so on the Reel Maintenance Section as I really really hope that some beginner anglers will learn the proper way to maintain their reels, the correct way to change roller bushing to bearing, and the right lube and oil for their applications. A cheap reel, if well maintained will last a long long time.

Well, till I have more update on my role or on the Magazine, I will give an update. For now, nothing is firm up yet, they might find me too 'Ah Beng' in my writing style or what so ever. Finger crossed, hope I can do something to return to the fishing community that I learn so much from.

11 February 2009

Change Bushing to Bearing

A very simple reel upgrade - Change the bushings (usually plastic) to a ball bearing. This will result in the reel giving you a smoother operation and with the correct lubricant, your economy reel can give you a very good fishing experience.

How do I do it?
This is the most often asked question seen in the local fishing forum. And it does irks me too see people asking it time and again with doing a search. Also seen questions like can this xxx model of reel can be upgraded?

First thing to do - You NEED to have the schematic of your reel on hand, as you need to open the reel at lease twice to do this upgrade. The schematic will give you an idea how to put back your reel after you dismantle it AND also tell you where to locate the bushings. If you cannot read the schematic, STOP whatever you are doing and bring it to a tackle shop and ask them to do it for you.

Locate where are the bushing to be located on the schematic, and open up your reel and take out the bushings to be replaced. Either take the necessary measurement ID, OD and Height OR bring these bushing to the bearing shop and seek their help to measure.

Get those bearing and replace the bushings and you have finish your upgrade. Reassemble your rell and you are ready to go!

Sometimes the bearing size might not have the exact size as the bushing for the height, so you need to see your reel housing can fit the bearing. Also unshielded bearing are shorter then shielded bearing, so get the correct sized ones.

10 February 2009

Reel Servicing

I have been servicing my own reels for a few years already, tried a few of the specialty product for fishing tackles. While most works but which one suit your application best is what you will need to find out. It irks me to see in forums where some contributors will slam one product and proclaim another product better. For me, it is to understand what the specific part you intend to oil/ grease and it's function. One very important point is how often do you service your reels.

In almost all reels, the first thing to go is the bearing. Most reel comes equipped with steel bearing, which will corrode over time. So most of the time, when servicing reel, bearings are changed and oil (will touch on that later). But given the types of bearing available these days what type of bearing to change to?
Manufacturers corrosion resistance bearing - Example Shimano ARB (Anti Rust bearing), SARD (Shielded ARB), Daiwa CRBB (Corrosion Resistance Ball Bearing). These bearing DO rust as well, BUT will still continue to rotate as it is claimed to be. But usually, will change it when it rust as I cannot take rusted bearings.
Steel / Stainless Steel / Precision Bearings - Widely available, relatively cheap, comes in shielded and unshielded. Easy to rust, but again cheap to replace. I use them mainly as I service my reels on a regular basis and oil these bearing often as well. Most works well to 3000rpm and above, fast enough even for surf fishing for me.
Ceramic Hybrid Bearings - Expensive, while the ceramic balls does not rust, the inner and outer race which is usually stainless steel will still rust. Used in application where HIGH speed is important. Usually it is TOO fast for most, so oil it lightly to SLOW it down.
Full Ceramic, SIC bearings - Super Expensive, super fast, and will not rust. Too expensive for me to try out and use it. If you have money to burn, replace all the bearings in your reel and you will never need to worry about rusted bearings again.

Bearings - Dry, Greased, Oil? Open, Shielded? What type of oil to use?
I will talk about NORMAL steel bearings only. Let's talk about the easier topic first, Open or Shielded.
Personally, I prefer to use Open type (I remove the shields of those shielded), as visually it is easier to identify which bearing is dirty or rusted. But if you seldom service your reels, then it is better to keep them shielded as it keeps out dirt and water. Also with Open bearing, it is easier for me to clean them using a pressurized degreaser to clean them. I do packed some with grease and put back the shield for some specific bearing and model of reels when I find it extremely rust prone and where rotating speed of the bearing is not important.
Dry, Greased, Oil - Most bearing usually have grease or oil when you purchase them. So clean them off using some solvent like Lighter Fluid. Now to lubricate them, what type of oil or grease should I use? Before you do anything, let's understand for that bearing, what is it's function and is speed important, where will you be using the reel mainly?
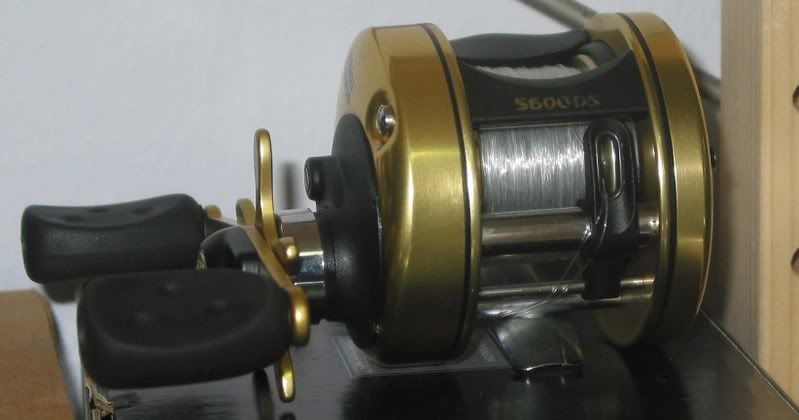
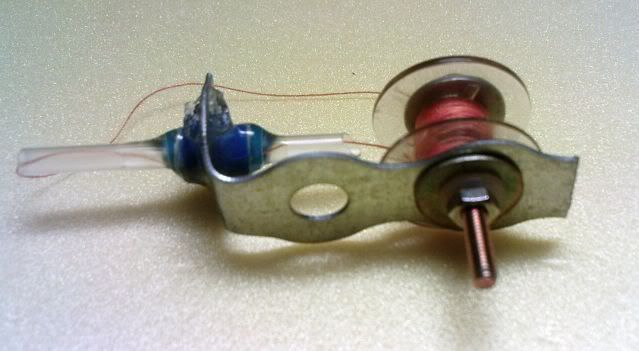
Let's take an Abu 6500 series BC reel as an example, there are just 3 bearings, 2 for the spool and one for the handle. For the 2 spool bearing, speed is pretty important obviously (if you are doing surf casting), so use a thin oil to ensure it will spin fast. For the handle bearing, speed is not important at all, so use a thicker oil for more protection. However, I usually open the shield and pack it with grease and put back the shield as I find the Abu 6500 and 7000 series handle bearing rust easily. BUT if you want to get a very smooth cranking feeling when you retrieve your line, you can use thin oil for the handle bearing as well, however it will provide less protection.
Spinning reels bearing does not need speed as most supports and provide a smooth cranking feeling only. So thin oil for smoother operation and thicker for protection make your own choice. For me if I use the reel for freshwater luring only, I will use thin oil as I want the smoothness as I cast and retrieve a lot.

Grease - Gears and drag are the 2 main thing we will be greasing. Some grease 'stick' better then others, thus will take a bit more effort when cranking. Let me share with you this experience I have, the Daiwa SS700 that I have been using for freshwater luring are greased using Teflon grease, which is smooth and cranking back the lures takes little effort. One day, because I need to use the reel for some Saltwater usage, I greased it using ZPI grease, which I know 'stick' better to the gears. The reel is still as smooth but it takes a bit more effort when retrieving, more torque required to work the reel.
As for the drag, I usually give it a thin coat of Cal grease, only grease I have for drag material. There are other drag grease available, pick one you like. Reason why I grease my drag - I prefer smoothness to raw power of dry drag.

One more item I miss out here, level winder worm shaft and paw. Grease or oil? I leave it to you, smoothness or protection. For me, usually I oil it as it is usually exposed and grease will pick up too much dirt.

Quick summary in my own view of type of fishing and type of oil to be used for conventional reels.
Boat / Bottom - Thicker oil for protection, spool speed not critical.
Surf - Thin oil for spool bearing, surf caster are suckers for distances (me inclusive)
Luring - Thin oil and Teflon grease preferred, as a lot of casting and retrieving required.

Click on the thumbnail below for the product I uses for reel servicing, I will give a quick run down for each of these product. More details on the product please Google yourself.
PhotobucketPhotobucketPhotobucket

TG Rocket fuel (Yellow) - I use it mainly for my surf reel bearing. Specially created for surf casting, also comes in Red and Tournament.
ZX1 Oil - Very thin and smooth oil, I use it for BC reels for luring. Like this oil a lot, except that it makes the bearing goes too fast for me usually.
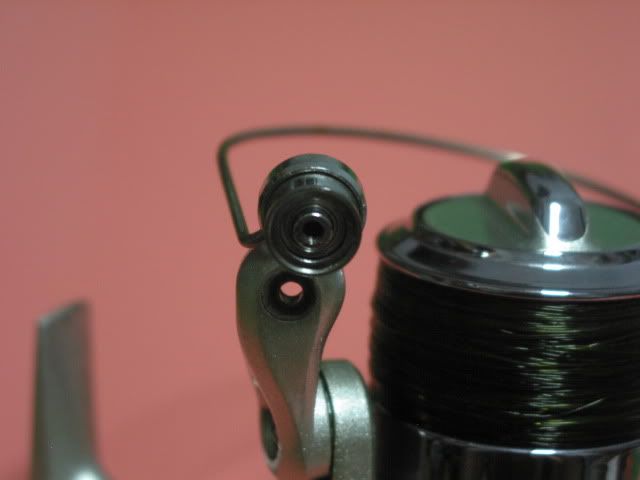
Corrosion X - Thin oil and suppose to repel water and thus it rust proof. I use it on roller bearing (extremely easily to rust), and spinning reels handle bearing for SW luring. Some use it to coat their spool before spooling up with line, as it is suppose to provide a rust inhabitant properties.
Abu Teflon oil - Think oil but with Teflon thus makes it pretty smooth on bearing. Use in mainly for my spinning reels handle bearing for FW luring as I find that it kind of dry up pretty fast.
ZX1 Grease - I use it for SW reels, as I find that I 'sticks' very well to the gears and over long period of time. Because it 'sticks' well, retrieving takes a bit more effort. I also use it to coat my spool before spooling in line, give the spool a layer of protection as I seldom remove the lines when washing the reel.
Cal Universal Grease - Good for all application and for drag too. Using it for drag material for now as I have a hell lot of grease to use.
Abu and Supergrease Teflon Grease - I find these 2 grease thins out pretty fast, although it still give the gears a layer of grease after it thins out, I don't trust it enough for SW application. Thus use these on my FW outfit only. However, these teflon grease are the smoothest grease in my arsenal right now, and I love them, only if they can come up with a new formula that does not thin out too easily.
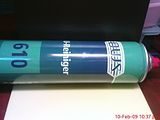
Luthium Grease (in red small container) - My GP grease, I use them for the screws and screw holes, coat the interior metal parts with this grease and also pack bearing with this grease. cheap for one big tub.
OWS degreaser - Use it to clean those Open bearing as it is faster then soaking it in lighter fluid and dry it, also use it to remove old harden grease esp in old never serviced reels (which I help friends to do it sometimes).
Local Anadoize solution (not in picture) - For spool with some form of corrosion like pits of deep scratch, I use it anadoized the exposed aluminium and stop further corrosion.

11 January 2009

Telfon Drag Washer

2 of my reels in recent time needed a change of drag washer, Ofmer Axis 6 (drag material worn out, becomes jerky) and Pioneer SF4000 (fabric material hardens), thus asked Nenasi to punch out the Telfon washer size I needed. The reason why I choose Telfon instead of carbon fibre is because both these reel does not need heavy drag for my intended use for them. These are virgin Teflon, and should last a long long time, and it's smooth properties shouldn't change.

New & Old Drag

Having tried out the smoothness with other reels at Nenasi's place, I am pretty impressed by the smoothness and thus giving a go on these 2 reels. Since it is the smoothness I am going for, the drag loss isn't an issue to me, also am attracted by the long life span and lack of need grease these drag washers. Should I need that extra drag power, i can always palm the spoon.

Ofmer Axis 6 Drag ChangeWill update after I have used these drag material for a prolong period time. Should be pretty fast since the Ofmer is use frequently for my luring trips.


Updated
Here's a link to my post on how to change Drag washer on spinning reels. Click Here

10 January 2009

New Lure Addition

Ari help me to purchase a Chug Bug from Sincere Tackle at just $7, kind of him to dig real hard to find this Green Color one for me. When he called me when he is there, he couldn't see any green one on display, so I asked him to get me the silver one. But his can really dig out a green one in the shop.

Meanwhile, I got a sample shipment from a China lure maker, which includes a few pieces of 21g spoon and spinner blades. The spoon profile look exactly like the US brand 'Kastmaster' and 'Mr. Champs', and I am very happy with the swim action when I try it out.

As for the spinner blades, they didn't ship with the Spin Clevises, so have to improvise but not too good effect. Thinking of some other ways to get them to spin right.


Related Posts Plugin for WordPress, Blogger...