Showing posts with label Tackle Talk - Accessories. Show all posts

09 March 2012

Tackle Shopping @ Beach Road, my intro to light jigging?

It have been a long long time since I do shopping for fishing stuff at Beach Road, when a non-fisho friend called to meet me there for lunch, well I agreed mainly because I can do some shopping.

Basically I have an idea what I needed, so shopping is pretty fast and easy for me. First stop is Lure Haven to pick up some Sasame swivel, as I have no idea which other tackle shop stocks them. I couldn't resist to pick up an Ima GUN 7g jig as well, heard so much good review about it but I dun really do jigging. My guess it is more of a case of just buy and keep the Ima GUN till someday to try it out.

While waiting for my friend, pop by one of the tackle shop and spoke to Alan Chan. I am looking for gold colored prawn hooks, as the thin wire gauge would be great to hook gargo bait, alas the shop have only black colored ones. Since have time, spend some time to find out more about light / micro jigging from Alan, as I don't do boat fishing, I am keen to try shoreline jigging only. Found out that is possible, but need concentration and risk losing jigs, well at least it is possible. It invoke interest in me to try out some day soon, since more or less I think I have the tackles needed, just need to buy some jigs to try out on one of those southern islands trips.

24 October 2009

Accessories for Prawning


I feel the need to know more about prawning after my virgin experience at doing prawn fishing.

Please do not misunderstood that suddenly, I became an expert in prawning and now telling you how to do prawning. What I am trying to achieve is to share what I have learnt while talking to other fisho who like prawning, and hopefully newbies and fisho ,who are as clueless as me when it comes to prawning, can come to grasp with the concept without tearing out one's hair.

Although I have very limited experience in prawning, but with my noodle rod and limited pole fishing experience, I felt that it is actually not as difficult as I thought it would be.

Back to main discussion topics, this post will be more applicable to those who already own or intend to buy their own prawning rod. As usually the house rod is 'ready to go', there's not much things you can do to it.

First of course is the rod selection, some like soft tip while some like it stiff. After asking around, it seems that most actually prefer a soft tip. No idea why, could be because it is more forgiving and gives you a better sensation while fighting the prawns. I have been told to use soft tip rods if I am to do SW prawning, as they are more alert and frisky then their FW cousin. Length wise will depends on which pond you frequent, choose one that suit the pond.

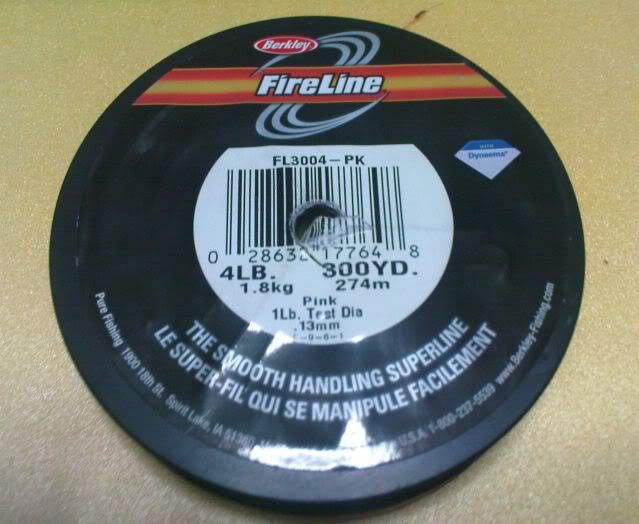
Next if the main line, if you have some spare light poundage superline use them, be it fireline, power pro, etc. The lightest poundage is enough. Although it is just a short length, it does makes a different to me at least, in fact I am surprised that it did make a difference. Should you do not have any light poundage superline around, when you purchase your rod, ask the tackle shop if they can spare you some. I do know some tackle shops do give it to their customer when they buy prawning rods from them.
As a guide, the length of the main line, plus swivel, plus the hook rig should not be longer then the extended rod. This will make it easy for you to handle the prawn when you have lift it out of the water.

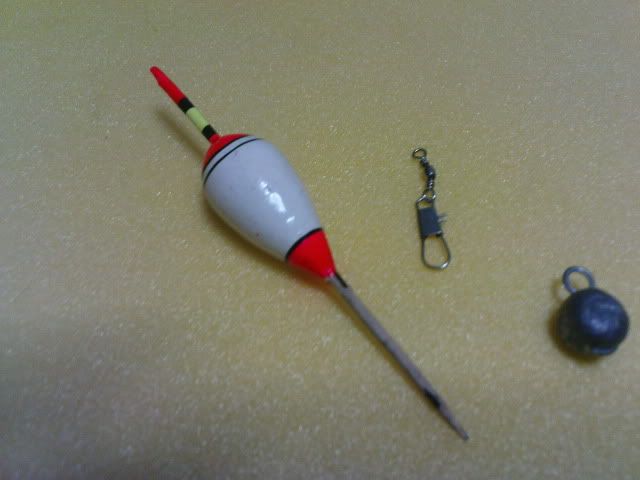
Prawning floats, that small tiny tear drop shaped float as shown in the pic above. Obviously, not all floats are created equally, in fact they come in different sizes / buoyancy, it is usually stated by a number on the float itself for the better quality ones. Unlike mine which is a cheapo version, there is no number indicator on it.
Once you have rigged up, and place the entire rig into the pond, the float should be resting between the 2 blacks lines, at the top of the float, at the water surface. Too much of the float above the water surface, the resistance of the float gives might cause the prawn to let go of the bait. Too little of it above the water, it get too sensitive that the water current might fool you to think a prawn is taking the bait. Do stock up some in different buoyancy, as on different day the water condition might be differs slightly.

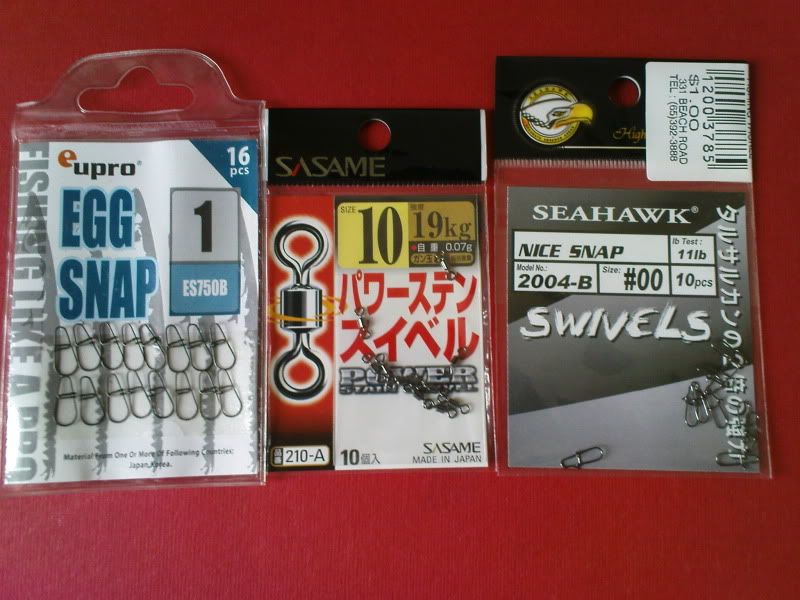
Use the smallest swivel you can find, the swivel gives it the required weight to sink downwards and easy for you to change the hooks should you need to easily. Before you secure the swivel, make sure you have the float stopper on the main line before you secure it. I dun have any float stopper to show the pics, basically it look like a short length of rubber tubing.

Prawns hooks are available in most tackle shops, they look like circle hooks. Gone were the days where the ultra tiny hooks are used, these new designed hooks makes it easier to remove the prawns once they are caught. However, I learn that sometimes those tiny hooks are still being used once a while by some prawning fisho, might be on slow biting days, something I have yet to discover. Hooks are usually available tied and ready at the pond, just asked the pond operator for it.

In case if you wonder if I have incorrectly include the lead weight in the pic, I have not. This is the last tiny bit of tips I wish to share. This is a fast and easy method to measure the depth of the pond, simply hook the lead weight to the hook and chuck it into the pond to adjust the position of the float. Really quick and effective way to measure the depth if you keep moving around the pond.

02 April 2009

How to DIY Jighead

I have shared these in a couple of local fishing forum, forget about it totally until now. Time to put it up on my blog.

Ever since I started luring, I have been looking for cheaper alternative for stuff I can DIY. Started out with DIY spin fly, then Jighead with tinsel, and now Jighead using offset hooks for rubbers.

For my FW application, I usually go for light tackle, hence 1/8oz jighead suits me well since I am now more interested to use rubber then hard lures. Anyway decided to experiment to DIY my own jighead with some very simple stuff. Furthermore can customized weight and hook size to your own liking.

DIY Jighead 01
Stuff you will need, Solvent Based Paint (A), Reflective Paper (B), Hooks (C), split shot (D), 10 or 5 min Epoxy (E), Super Glue (F), Hole Puncher (G).
For rubber better to use off set hooks, pic of off set hooks and finished jighead. Link Here


DIY Jighead 02
Drop a little Super Glue between the groove of the split shot and insert the hook. Apply pressure till set.

DIY Jighead 03Photobucket
Use hammer to hit on either side till the split shot gap is enclosed completely onto the hook shaft. Or just a clamp to do this job. Make sure the flat surface created is large enough to paste an "eye" on it.

Photobucket
Next is simply a paint job, use primer if you have else like me just do 2 coat. If you intend to dip the entire jighead portion into the paint to color it, insert a toothpick in the eye of the hook before doing it, this will prevent the paint from covering up the entire eye.

PhotobucketPhotobucketPhotobucket
Using the hole puncher, punch out some round reflective paper. Paste it onto the flatten surface using super glue and finish it with a coat of epoxy. Draw a black dot on the reflective paper to complete the eye. Alternatively, use those ready made 'eyes' available from tackle shop to do so.

Final pics are my tinsel added jighead for PB hunting, use it like a lure except you impart all the action yourself thru wrist and rod action.
DIY JigHead Fly

01 April 2009

Luring Snaps & Swivel

Ever since I took up luring, I have been searching for small swivel and good snaps to use.

Sasame Swivels
Seasoned lurers told me big swivel can affect lures swimming actions, furthermore I have a liking to use small lures for FW, so small swivels is a must. After searching and asking around, finally decided on the Sasame Swivels, for it's size, it's rating is extremely high. Imagine, 19kg rating for the smallest one (size 10) I can find, I find it hard to believe but still bought it and use it. After a few times I am convinced it is indeed very strong but still 19kg is untested water for it.

The day came when it get tested out is while talking to DesT, he mentioned that those ridiculously small Surecatch swivels he use for his noodle rod application are super inconsistent. Same Size different rating, 4kg or 4lbs, very likely due to different batches. And while he tested them, some broke below the 4lbs mark, one batch fails so badly that it have around 50% pass rate. I recommended him the Sasame swivel and you guess it, he did test them out. At 9kg, the rings deformed to diamond shaped, and at 19kg, it still works and swivels. Now I can use it in peace, knowing it will holds up well and well below my line rating for luring.

Comes in red or black and at around 40 cents per piece, not exactly cheap but heck if it keeps my lure on my line, I will be happy to use them.


Seahawk Snaps

I do agree that these Seahawk snaps are very likely re-branded make in china snaps. But recommended to me by Eric of Tackle2000. I do like it a lot, pretty strong and easy to change lures. So far no failure. Cannot compare to those decoy and genesis Egg Snaps, but good enough for me. and at around 10 cent per piece, very affordable.

Sasame Swivel & Seahawk Snaps
Related Posts Plugin for WordPress, Blogger...